Quick Facts
- Video Quality: 1080p HD video resolution with infrared night vision for 24/7 monitoring.
- Connectivity: Uses Wi-Fi 2.4GHz or 5GHz for high-bandwidth video and the Zigbee protocol for low-latency Bridge triggers.
- Security: Features integrated end-to-end encryption by default to protect live feeds and recorded clips from unauthorized access.
- Ecosystem Capacity: A single Philips Hue Bridge supports up to 50 smart lights and 12 accessories, including cameras.
- Smart Integration: Enables your camera to act as a trigger for automated home security scenes and smart lighting integration.
To begin your Philips Hue camera setup, open the Hue app, navigate to the Devices menu, and select Add devices. Scan the QR code on your ownership card or enter the serial number manually if the code is unavailable. Ensure your Hue Bridge is active and connected to the same network to enable features like end-to-end encryption and synchronized lighting triggers.
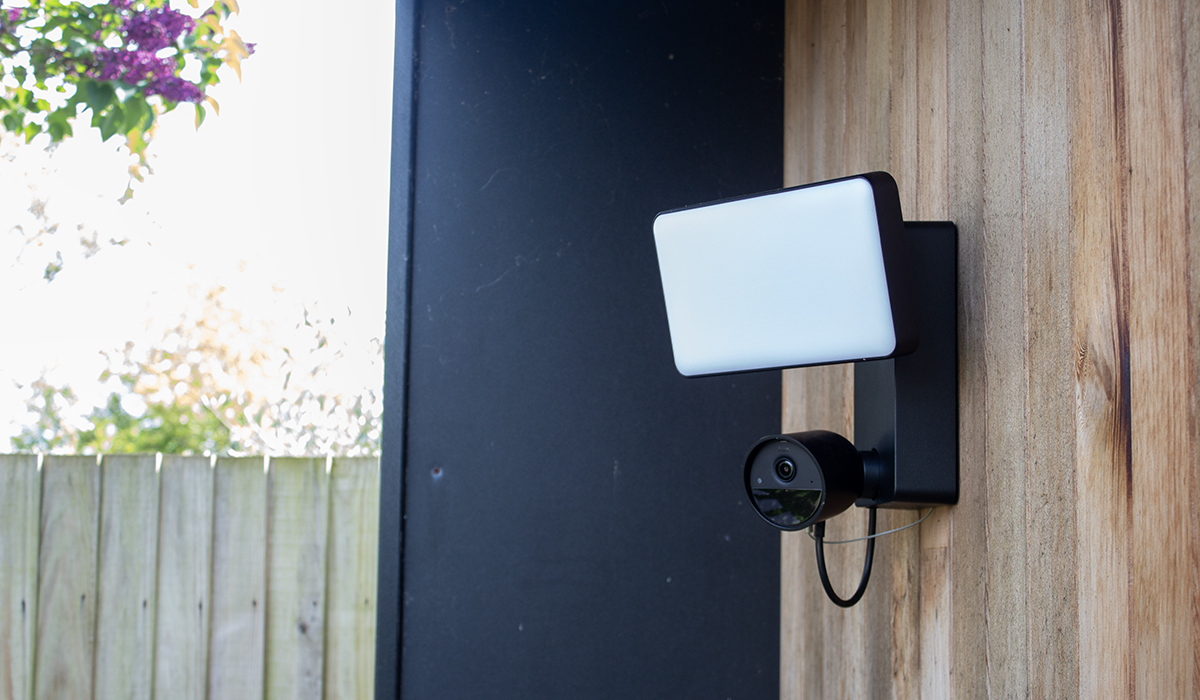
Setting up your new security system shouldn't be stressful. This Philips Hue camera setup guide walks you through the Hue Bridge camera pairing guide to ensure your home is protected with end-to-end encryption and automated lighting triggers. Whether you are installing the wired version for constant power or the battery-powered model for flexible placement, the goal is a seamless experience that merges security with the lighting you already love.
Essential Prerequisites: Firmware and Ownership Card
Before you begin the physical installation, a few technical checks can prevent common headaches. The first step in any Philips Hue camera setup is ensuring your hardware is ready to talk to the software. Philips Hue Secure cameras are compatible with both 2.4 GHz and 5 GHz Wi-Fi networks for video transmission, but the Hue Bridge remains the brain of the operation, coordinating motion events via the Zigbee protocol.
Start by verifying your Hue Bridge firmware. You need Version 2071280000 or newer to support the secure features. If your Bridge is outdated, you may run into firmware synchronization errors that prevent the camera from appearing in your device list. Next, locate your physical ownership card. This small piece of cardstock contains a unique QR code and a passphrase. You must keep this card in a safe place, as it is required for future resets and acts as your primary recovery method. Learning how to use Hue ownership card for camera reset now will save you time later if you ever need to migrate your device to a new system.
Finally, check your smartphone settings. A common pitfall involves the Philips Hue Secure app system permissions configuration. Ensure the Hue app has access to Bluetooth (for initial discovery), your camera (to scan the QR code), and the Local Network (to communicate with the Bridge). Without these permissions, the onboarding process will likely stall before the camera even connects to your Wi-Fi 2.4GHz band.
Step-by-Step Bridge Integration and Pairing
The magic of this system lies in the Philips Hue Secure camera setup with Bridge. By connecting to the Bridge, you move beyond simple motion alerts and unlock a proactive security ecosystem. The integration process is designed to be intuitive, following a logical flow within the Hue app.
- Launch the App: Open the Philips Hue app on your mobile device. Ensure you are signed into your Hue account, as this is necessary for remote access and end-to-end encryption.
- Add Device: Navigate to Settings > My devices and tap the Plus (+) icon or Add devices.
- Identify the Camera: Select Camera from the list of device types. The app will prompt you to scan the QR code found on the back of the camera or on your ownership card.
- Manual Entry Alternative: If your phone camera cannot read the code, look for the option for setting up Hue Secure camera without QR code using serial number. The serial number is usually found near the QR code on the physical device.
- Power On: Plug in your wired camera or ensure your battery camera is fully charged. Once powered, the LED on the camera will blink to indicate it is in pairing mode.
- Bridge Syncing: The app will search for the device using Bluetooth initially. Once found, it will ask you to select your Wi-Fi network. Ensure you choose a stable connection, as 1080p HD video requires consistent bandwidth.
Once the camera is connected to Wi-Fi, the app will finalize the link to your Hue Bridge. This is where the Zigbee protocol comes into play, allowing the camera’s internal PIR motion sensor to trigger lights instantly across your home without relying on a cloud signal.

Configuring the Secure App: Settings and Security Tab
After the physical Philips Hue camera setup is complete, you need to tailor the software to your environment. The Security tab in the Hue app is your command center. This is where you will define how the camera behaves when you are home versus when you are away.
One of the most important steps in Philips Hue Secure app configuration is setting up activity zones. These digital boundaries allow you to tell the camera which areas to monitor and which to ignore, such as a busy street or a neighbor's yard. By fine-tuning these zones, you reduce false positives and ensure that your home automation triggers are only activated by relevant movement.
You should also take a moment for configuring MotionAware and Do Not Disturb on Hue Bridge. MotionAware allows the system to change its alert sensitivity based on the time of day or your presence. For instance, you might want high-sensitivity alerts while you are sleeping but a Do Not Disturb mode during the afternoon when the kids are playing in the yard. If you have a cloud storage subscription, ensure your end-to-end encryption passphrase is saved in your digital vault so you can view recorded clips from any location.
Ecosystem Synergy: Linking Cameras with Smart Lighting
What sets this system apart from a standard standalone camera is the smart lighting integration. While many cameras simply record an intruder, the Hue system reacts. Because the camera communicates via the Bridge, it can turn your entire house into a deterrent.
When the PIR motion sensor detects an unauthorized person in an activity zone, you can configure the Bridge to flash every light in the house red or turn all outdoor floods to 100% brightness. This immediate visual response often deters a potential intruder before they even reach the door.
| Feature | Bridge Connected | Standalone (Bluetooth/Wi-Fi only) |
|---|---|---|
| Max Devices | 50 lights / 12 accessories | 10 devices |
| Encryption | End-to-end default | Standard encryption |
| Light Alarms | Whole-home synchronization | Not supported |
| Remote Access | Always available | Limited |
| Local AI | Person/Animal/Vehicle detection | Basic motion only |
This synergy is built on local processing. By keeping the logic on the Bridge rather than sending every motion event to the cloud first, the reaction time is nearly instantaneous. This is the hallmark of a high-quality Philips Hue camera setup.
Troubleshooting Common Setup Failures
Even with the best hardware, you might encounter issues. If you find yourself troubleshooting Hue Secure onboarding network connection failures, the first thing to check is distance. While the camera uses Wi-Fi for video, it still needs to be within Zigbee range of the Bridge or a nearby Hue bulb to function as a security trigger.
If the camera is not being discovered during the initial scan, try a hard reset. This is where your preparation pays off. Use a small tool to press the reset button on the back of the device while referring to your ownership card for the necessary credentials. If you are attempt to troubleshoot Hue camera setup issues related to Apple HomeKit, ensure your Bridge is properly linked to the Home app and that you have a compatible HomePod or Apple TV to act as a hub.
Sometimes, the app may show the camera as "Offline." This usually relates to firmware synchronization or Wi-Fi interference. Ensure no large metal objects are between your camera and the router. If problems persist, deleting the camera from the app and performing a fresh Philips Hue camera setup using the ownership card is the most reliable fix.

FAQ
How do I set up a Philips Hue Secure camera?
To set up your camera, power it on and open the Philips Hue app. Navigate to the Devices section, select Add device, and scan the QR code on your ownership card. Follow the on-screen prompts to connect to your Wi-Fi and pair the device with your Hue Bridge for full functionality.
Do Philips Hue cameras require a Hue Bridge to work?
While the cameras can function in a basic capacity via Wi-Fi for live streaming, a Hue Bridge is required to unlock advanced features like smart lighting triggers, end-to-end encryption for stored clips, and the ability to link with other Hue sensors and accessories.
Can I install a Philips Hue camera without a subscription?
Yes, you can use the camera without a subscription for live viewing, real-time motion alerts, and basic integration with your lights. However, a subscription is required if you want to access cloud-based video recordings, 30-day event history, and AI-driven detection for people, animals, or vehicles.
How do I connect my Philips Hue camera to the app?
Connection is handled through the Philips Hue app on your smartphone. Ensure Bluetooth and Local Network permissions are enabled. After clicking Add device, the app will use Bluetooth to find the camera and then guide you through connecting it to your home Wi-Fi network and Bridge.
How do I reset a Philips Hue Secure camera to factory settings?
Locate the reset button on the camera (usually near the charging port or base). Press and hold the button for approximately 10 seconds until the LED light changes color. You will then need your ownership card to re-add the camera to your system as if it were a new device.