Quick Facts
- Bacteria Levels: The average keyboard harbors 400x more bacteria than a toilet seat.
- Disinfection Standard: Use 70% Isopropyl alcohol (IPA) for the safest and most effective results.
- Deep Clean Frequency: Perform a comprehensive cleaning every 1 to 2 months.
- Surface Clean Frequency: A quick wipe and air blast should be done weekly.
- Keycap Drying Time: Always allow a minimum of 24 hours for keycaps to air dry after washing.
- Spill Recovery Time: If a spill occurs, wait at least 48 hours before reconnecting power.
To maintain hygiene and prevent debris buildup, perform a surface wipe and use compressed air on your keyboard at least once a week. A comprehensive deep cleaning, which involves removing keycaps and sanitizing the areas between switches, is recommended every one to two months to ensure hardware longevity and optimal performance.
Why Your Workspace Hygiene Matters
We spend hours every day with our hands glued to our peripherals, yet the keyboard is often the most neglected part of a computing setup. It is not just about the crumbs from your mid-afternoon snack; there is a significant biological component to workspace hygiene that most users overlook. Research from the University of Arizona found that the average computer keyboard can harbor up to 400 times more bacteria than a toilet seat. When you consider how often we touch our faces or eat near our workstations, those numbers become a genuine health concern.
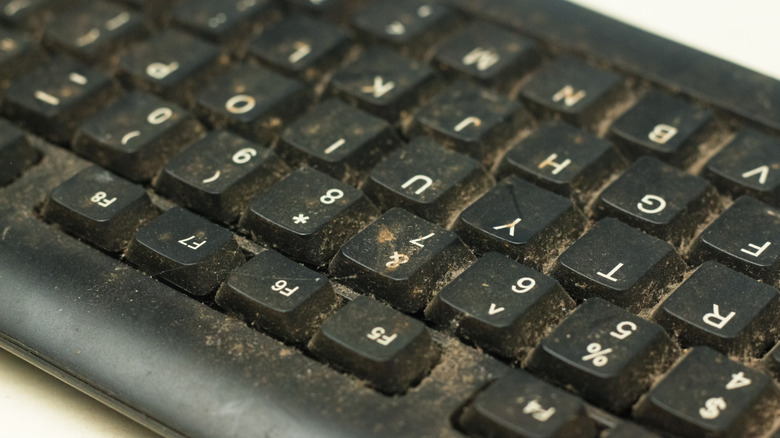
It is not just an isolated study, either. A large-scale survey of office buildings revealed that 27% of keyboards tested had high levels of microbial contamination. This bacterial growth is fueled by skin oils, dead skin cells, and ambient humidity, creating a perfect breeding ground under your fingertips. Beyond the health risks to you, dust accumulation and grime can lead to hardware failure. Debris can jam switches, cause "key chatter" (where a single press registers multiple times), or even interfere with the delicate sensors in modern high-end boards. The good news is that a study on office hygiene demonstrated that cleaning computer equipment once a day with disinfecting wipes can lead to a 99.9% reduction in bacteria levels.
The Essential Keyboard Maintenance Toolkit
Before you start pulling apart your hardware, you need the right tools. Using the wrong chemicals or abrasive materials can ruin the finish on your keycaps or, worse, short out the internal electronics. Professional keyboard cleaning requires a specialized kit to ensure you are doing the job safely.
- Keycap Puller: Do not use a flathead screwdriver or your fingernails. A wire-style keycap puller is the best tool for mechanical keyboard switches because it reduces the risk of scratching the sides of the caps or putting uneven pressure on the switch stems.
- 70% Isopropyl Alcohol: While 99% alcohol is common in electronics repair, 70% isopropyl alcohol is often preferred for hardware sanitization tips because the higher water content allows it to penetrate cell walls of bacteria more effectively before evaporating. However, be cautious with cheap ABS keycaps, as high concentrations of alcohol can occasionally cause the plastic to become brittle or the legends to fade.
- Microfiber Cloth: Avoid paper towels, which can leave behind lint and scratches. A high-quality microfiber cloth is essential for wiping down surfaces without leaving residue.
- Soft-Bristle Brush: A clean paintbrush or a dedicated electronics brush is perfect for dislodging dust from between switches.
- Compressed Air: A staple for any PC builder, a can of compressed air is the fastest way to blow out loose hair and dust.
- Cleaning Gel: Also known as "keyboard slime," this is great for picking up loose particles in hard-to-reach crevices without using liquid.
Surface Cleaning vs. Deep Cleaning Schedules
Not every cleaning session needs to be a full teardown. I recommend a tiered approach to peripheral maintenance to balance hardware longevity with your personal schedule. A quick weekly touch-up keeps the bacterial growth in check, while a monthly deep clean handles the deep-seated grime that builds up inside the switch housing and plate.
| Feature | Weekly Surface Wipe | Monthly/Bi-Monthly Deep Clean |
|---|---|---|
| Time Investment | 5 Minutes | 45-60 Minutes |
| Disassembly | None | Full keycap removal |
| Tools Needed | Microfiber cloth, Air, IPA | Keycap puller, Soap, IPA, Brushes |
| Primary Goal | Sanitization and dust removal | Removing skin oils and internal debris |
| Hardware Safety | Very High | Moderate (requires care with switches) |
For any deep clean, the golden rule—Step 0—is to take a high-resolution photo of your keyboard layout. Even if you think you know where every function key goes, a reference photo prevents the frustration of trying to remember if the 'Home' key was above or below 'Page Up' when you are reassembling the board two hours later.
Cleaning Laptop Keyboards Safely
Laptops require a much more delicate touch than desktop boards. Because the keyboard sits directly on top of the motherboard, battery, and other vital electronic components, you cannot afford to have any liquid seepage. Cleaning laptop keyboards safely is as much about what you don't do as what you do.
First, always power down the device and unplug it from any power source. If your laptop has a removable battery, take it out. Use a can of compressed air to blow out loose particles. Hold the laptop at a 75-degree angle so the debris falls out rather than getting pushed deeper into the chassis. When using compressed air, ensure the can stays upright; tilting it can spray liquid propellant onto your sensitive hardware.
For the actual sanitization, never spray cleaning agents directly onto the laptop. Instead, lightly dampen a microfiber cloth with 70% isopropyl alcohol. The cloth should be damp, not dripping. Wipe each key individually, applying gentle pressure. This method helps in removing sticky residue from keyboard keys without risking moisture ingress into the sensitive sensors or membrane layers beneath.
The Mechanical Keyboard Deep Dive
If you are an enthusiast, mechanical keyboard maintenance is a ritual. Because these boards are designed to be modular, you can achieve a level of cleanliness that is impossible with a laptop or a membrane board.
- Remove the Keycaps: Using your wire keycap puller, carefully remove all caps. Pull straight up to avoid bending the switch stems.
- The Soak: Prepare a bowl of warm water with a few drops of mild dish soap. Submerge the keycaps and let them soak for 15 to 30 minutes. This is the most effective way to break down skin oils and sweat.
- The Plate and Switches: While the caps soak, use your soft-bristle brush and compressed air to clean the keyboard plate. If you have a hotswap board, be careful not to knock any switches loose.
- Sanitize the Switches: Use a cotton swab lightly dipped in isopropyl alcohol to wipe the sides of the switch housings. This is also the time to check for any signs of wear.
- The Drying Phase: This is the most critical step in safe ways to wash mechanical keyboard keycaps. After rinsing the caps in fresh water, lay them out on a towel with the stems facing down. You must allow them to dry for at least 24 hours. Any moisture trapped inside the keycap stem can migrate into the switch and cause a short circuit on the PCB.
Visual Warning: If you use Hall Effect or Optical switches, be extremely careful with dust and liquids. These switches rely on magnets or light beams to register a keystroke. Even a small amount of residue on the sensor can lead to erratic behavior or dead keys.
Emergency Protocol: Liquid Spill Response
We have all been there—a misplaced coffee cup or a tipped water bottle can feel like a death sentence for your hardware. If you spill liquid, your reaction time determines whether the board survives.
Immediately unplug the keyboard or power off the laptop. Do not wait to finish your sentence or save your game. Turn the keyboard upside down over a towel to let the liquid drain out of the switches rather than into the PCB. If the spill was sugary (like soda or juice), you will likely need a professional deep clean to prevent the keys from becoming permanently sticky.
Whatever you do, avoid the rice myth. Rice does not effectively pull moisture out of sealed electronic components and often introduces dust and starch that can gum up the switches. Instead, use a fan to circulate air around the inverted keyboard and wait at least 48 hours before attempting to plug it back in. Patience is the best tools for cleaning mechanical keyboard switches after a disaster.
FAQ
How do I clean a mechanical keyboard?
Start by removing the keycaps with a wire puller and soaking them in warm, soapy water. While they soak, use a brush and compressed air to remove debris from the exposed plate. Wipe the plate with a cloth dampened with 70% isopropyl alcohol, ensuring the keycaps are completely dry for 24 hours before reassembling.
Is it safe to use rubbing alcohol on keyboard keys?
Yes, 70% isopropyl alcohol is generally safe for most keycaps and is the industry standard for how to disinfect a keyboard safely from bacteria. However, avoid using it on painted or "coated" keycaps often found on cheaper laptops, as it can occasionally cause the coating to peel. Always test a small, inconspicuous area first.
How often should you deep clean your keyboard?
A recommended keyboard deep cleaning schedule is once every one to two months. This frequency prevents the buildup of skin oils and deep-seated dust that can eventually interfere with switch performance or create an unhygienic workspace.
Can you use compressed air to clean a laptop keyboard?
Yes, but you must use it correctly. Hold the laptop at an angle so the dust can fall away from the device. Keep the air can upright to prevent liquid propellant from spraying onto the electronic components, which could cause thermal shock or moisture damage.
How do you disinfect a keyboard without damaging it?
The safest method is to use a microfiber cloth lightly dampened with 70% isopropyl alcohol. Avoid using bleach, aerosol sprays, or excessive liquid. By controlling the moisture on the cloth, you can kill 99.9% of bacteria without risking a short circuit.
How do you clean sticky keys on a laptop?
To fix sticky keys, power down the laptop and use a cotton swab lightly dipped in isopropyl alcohol to clean around the edges of the key. If the stickiness is internal, you may need to consult a professional, as laptop scissor switches are extremely fragile and easily broken during DIY removal.
Final Advice for Longevity
Maintaining your hardware isn't just about making it look "clean for the 'gram." It is a fundamental part of being a PC user. By following these hardware sanitization tips and avoiding common keyboard cleaning mistakes to avoid—like using a vacuum (which can cause static discharge) or rushing the drying process—you ensure that your gear lasts as long as possible. A clean workspace is a productive workspace, and your hardware will thank you for the extra care.