Quick Facts
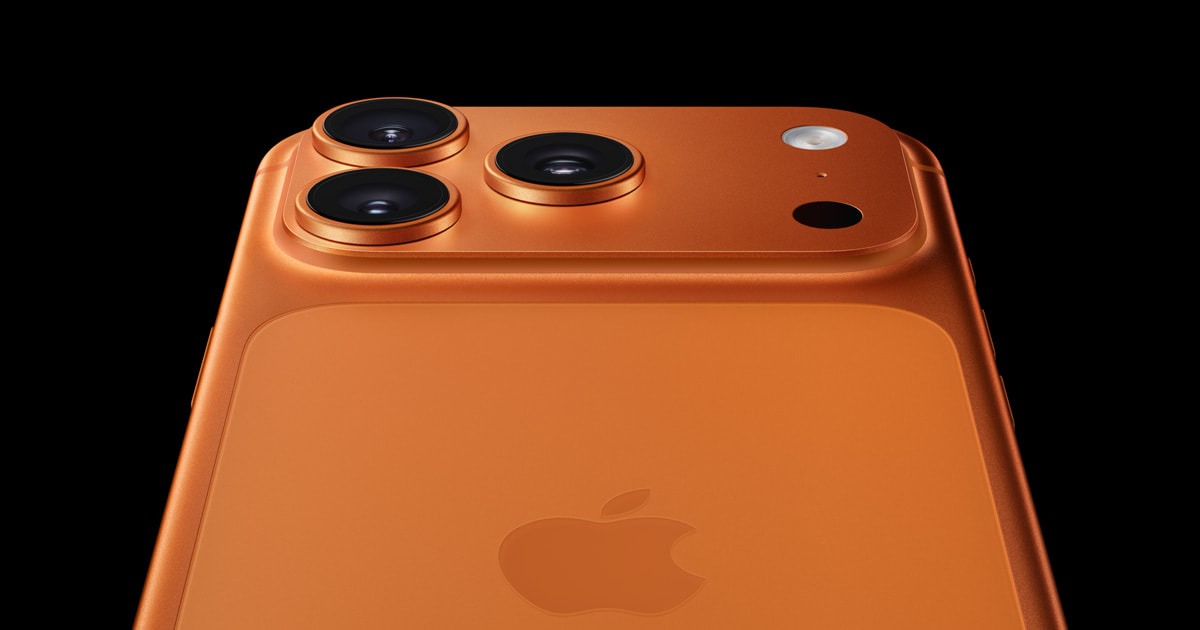
- Resolution: The iPhone 17 Pro and Pro Max feature a triple-lens 48-megapixel rear camera system across the main, ultra wide, and telephoto lenses.
- Primary Format: Use 24MP for a standard balance of detail and storage, or 48MP ProRAW for maximum post-production flexibility.
- Telephoto Upgrade: The 48-megapixel telephoto sensor is 56 percent larger than the previous generation, measuring approximately 23.5 square millimeters.
- Video Standard: For a cinematic look, record in 4K at 24fps using Apple Log 2 for professional color grading.
- Hardware Shortcut: The pressure-sensitive Camera Control button allows for manual adjustments of aperture, exposure, and zoom.
- Storage Requirements: External SSD recording via USB-C is required for high-bitrate ProRes video at 4K/120fps.
- Zoom Capabilities: System provides 4x optical zoom at a 100mm focal length and an 8x optical-quality zoom via a center crop.
To optimize your iPhone 17 Pro camera settings for professional use, switch your default resolution to 24MP and enable 48MP ProRAW in the Formats menu. To configure the iPhone 17 Pro Camera Control button, navigate to the Camera menu in Settings to customize activation patterns and sensitivity. This hardware shortcut allows users to launch the camera, capture images, and adjust parameters like aperture or exposure using a pressure-sensitive interface. Setting the button to a double-press can prevent accidental pocket launches while ensuring rapid access for professional shooting.
Mastering the Physical Interface: The Camera Control Button
The introduction of the physical Camera Control button represents a significant shift in how photographers interact with the iPhone 17 Pro camera settings. This is not merely a shutter button; it is a multi-stage, pressure-sensitive interface designed to mimic the tactile response of a high-end mirrorless camera. For the professional photographer, the utility of this button lies in its ability to minimize screen interaction, keeping your eyes on the subject rather than the UI.
In the iPhone 17 Pro Camera Control Button guide, the first step for any serious user is to adjust the click sensitivity. By navigating to Settings > Camera > Camera Control, you can calibrate the amount of force required for a light press versus a full click. A light press typically brings up a clean overlay of secondary settings, such as exposure compensation or focal length selection. I recommend setting the activation to a double-press. This simple change reduces the frequency of the camera launching accidentally while the device is in a pocket or bag, a common frustration for those who rely on their phone as a primary or secondary tool.
Customizing the specific function of the light press is where the professional advantage becomes clear. You can map this gesture to control aperture in Portrait mode or exposure compensation in standard Photo mode. Because the button recognizes swipes, you can slide your finger across the surface to fine-tune your values. This allows for an organic flow when shooting, as you can adjust the brightness of a scene without losing your grip or obscuring the viewfinder. It is particularly effective when working in challenging lighting where the computational photography system might overexpose a moody scene. This level of manual override is essential for maintaining creative control.
Photography Formats: ProRAW vs. HEIF 48MP
Choosing the right file format is the foundation of best iphone 17 pro camera settings for professional photography. With the iPhone 17 Pro, Apple has standardized the triple-lens 48-megapixel rear camera system, meaning you finally have high-resolution data coming from the ultra wide and telephoto lenses as well as the main sensor. However, more pixels do not always mean a better photo; how those pixels are processed and stored is what matters.
For daily professional use where you need high image quality but must manage storage, the HEIF format at 48MP is the optimal choice. It utilizes efficient compression while retaining the massive resolution needed for large prints or significant cropping. However, when the job requires maximum dynamic range—such as architectural photography or high-contrast landscapes—you must utilize the iPhone 17 Pro ProRAW configuration. ProRAW files are 10-bit linear DNGs that retain the raw sensor data alongside Apple’s computational photography metadata.
| Format | Resolution | File Size (Approx.) | Best Use Case |
|---|---|---|---|
| HEIF | 24MP | 3 MB | General professional use, social media |
| HEIF Max | 48MP | 5 MB | High-detail shots for quick delivery |
| ProRAW | 12MP | 25 MB | Low light where noise reduction is critical |
| ProRAW Max | 48MP | 75 MB | Fine art prints, commercial work, heavy editing |
Setting up iphone 17 pro proraw for high resolution photos involves navigating to Settings > Camera > Formats and toggling on ProRAW & Resolution Control. Within this menu, select ProRAW Max (up to 48MP). Be prepared for the storage implications: a single 48MP ProRAW file can exceed 75MB. This is why many professionals treat ProRAW as a specialized tool rather than a default. The depth of field and color latitude you gain in the post-production workflow when using ProRAW is indispensable for professional-grade results, allowing you to recover highlights and shadows that would be lost in a standard HEIF or JPEG.
Professional Video: Apple Log 2 and External Workflows
Video capabilities on the iPhone 17 Pro have reached a point where the device can legitimately serve as a B-cam on professional sets. To achieve these results, you must move beyond the basic video toggles. The iphone 17 pro cinematic video recording setup begins with selecting the correct frame rate. For the traditional "film look," set your recording to 4K at 24fps. If you are shooting fast-paced action or require the ability to slow down footage in post-production, 4K at 60fps or the new 120fps mode is the way to go.
A critical component of this workflow is Apple Log. Recording in a logarithmic profile preserves more detail in the highlights and shadows, providing a flat image that is designed for color grading. This is a technical standard that professional colorists expect. When using Apple Log, I highly recommend adopting the ACES (Academy Color Encoding System) standard if you are integrating your footage into a larger production.
Recording in high-bitrate ProRes at 4K/60fps or higher creates an immense amount of data that internal storage often cannot handle. This necessitates connecting iphone 17 pro to external storage for prores video. Using the USB-C 3.0 port, you can plug in a high-speed external SSD. The camera app will automatically recognize the drive and allow for higher frame rates and longer recording durations. This setup also simplifies the transition to the editing bay, as you can simply unplug the SSD and connect it directly to your workstation. For handheld work, Action Mode provides gimbal-like stabilization, though it does involve a slight crop of the sensor to achieve that smoothness.
Advanced Configuration: Lens Selection and Preservation
The hardware leap in this generation is significant, particularly regarding the telephoto lens. The 48-megapixel telephoto sensor is 56 percent larger than the previous generation, which greatly improves performance in dim environments. This sensor provides a 4x optical zoom at a 100mm focal length, a classic choice for portraiture that offers flattering compression of facial features.
To maintain professional control over your framing, you must disable the automatic lens switching feature. By default, the iPhone will switch lenses based on light levels and distance, sometimes jumping from the telephoto lens to a crop of the main sensor if it detects low light. For a professional, this shift is jarring and unpredictable. Go to Settings > Camera and toggle on Macro Control and then ensure you can manually select your lens in the app interface. This ensures that when you choose the 100mm focal length, you are utilizing that specific 48MP sensor.
Furthermore, the Preserve Settings menu is your best friend. In a professional environment, you cannot afford for the camera to reset to default every time the app closes. I recommend enabling the following:
- Camera Mode: Retains the last used mode (e.g., Video or Pano).
- Creative Controls: Keeps your preferred aspect ratio and light filters.
- Exposure Adjustment: Ensures your exposure compensation stays where you set it.
- ProRAW & ProRes: Prevents the camera from reverting to compressed formats mid-shoot.
By locking these iPhone 17 Pro camera settings, you create a consistent shooting environment that mimics the behavior of a dedicated camera body. You can also utilize the 8x optical-quality zoom, which is achieved through a 12-megapixel center crop of the 48-megapixel telephoto sensor. While not a true optical zoom at that specific magnification, the high pixel density of the new sensor ensures that the results remain sharp enough for professional use.
FAQ
How do I optimize camera settings for iPhone 17 Pro?
To optimize for professional use, go to Settings > Camera > Formats and set the Photo Capture resolution to 24MP. Enable ProRAW & Resolution Control and set the ProRAW Default to ProRAW Max (48MP). This configuration ensures you have the best balance between computational photography benefits and raw data for editing. Also, turn on Grid and Level in the Composition menu to assist with framing and alignment.
What are the best video recording settings for iPhone 17 Pro?
For professional results, set your video recording to 4K at 24fps for a cinematic look or 4K at 60fps for action. Enable Apple Log in the Formats menu if you plan on color grading your footage. For the highest quality, connect an external SSD via USB-C to unlock ProRes recording at 4K/120fps, which provides the most data-rich files for post-production.
How to enable 48MP resolution on iPhone 17 Pro?
Open the Settings app, navigate to Camera, and select Formats. Toggle on ProRAW & Resolution Control. Once this is enabled, you will see a 'RAW Max' or 'HEIF Max' icon in the top right corner of the Camera app. Tap this icon to ensure it is not crossed out before taking your photo. Note that 48MP capture is most effective with the 1x, 0.5x, and 5x (or 4x) optical lenses in well-lit conditions.
How to use the cinematic mode settings on iPhone 17 Pro?
Cinematic mode allows you to record video with a shallow depth of field. To use it professionally, tap the 'f' icon in the Camera app to manually adjust the aperture (f-stop) before or during recording. A lower number like f/2.0 will create a more blurred background. Remember that you can also change the focus points and the level of background blur in the Photos app after the video has been recorded.
How do I disable automatic lens switching on iPhone 17 Pro?
Navigate to Settings > Camera and scroll to the bottom to find the Macro Control toggle. Turn this on. Now, when you are close to a subject, a small yellow flower icon will appear in the Camera app. Tapping this icon allows you to prevent the camera from automatically switching to the Ultra Wide lens for macro shots, giving you manual control over which of the three 48MP sensors is active.
Final Recommendations for Professionals
Mastering the iPhone 17 Pro camera settings is about more than just toggling switches; it is about understanding how the hardware and computational photography work in tandem. The triple 48MP sensor array is a massive leap for mobile imaging, particularly for those who need high-resolution output across all focal lengths.
I encourage you to spend a day testing the Camera Control button sensitivity and the Apple Log 2 dynamic range in various lighting conditions. Every photographer has a different rhythm, and the iPhone 17 Pro is the first Apple device that truly allows you to customize that rhythm through its physical and digital interfaces. Whether you are shooting a high-end commercial or capturing a high-fidelity landscape, these settings provide the technical foundation required for professional success. Share your results with the community and continue to push the boundaries of what this pocket-sized studio can achieve.