Quick Facts
- Primary Emulator: Ryujinx is the current gold standard for compatibility and gyro support on the handheld.
- Required Files: You must provide your own legally dumped prod.keys, title.keys, and System Firmware.
- Storage Format: For best results, your microSD card should be formatted to ext4 via the SteamOS settings.
- ROM Formats: Supported file types include .nsp, .xci, .nsz, and .nro.
- Control Tip: Do not enable Proton compatibility in Steam for emulated games as it breaks the launch scripts.
- Critical Directory: System files belong in the Emulation/bios/ryujinx folder within your primary storage.
The Steam Deck is the ultimate handheld, but an EmuDeck Switch setup unlocks its full potential. By following these 4 easy steps, you can integrate your Switch library directly into SteamOS. We cover everything from Ryujinx configuration to Steam ROM Manager parsers. To perform an EmuDeck Switch setup, first install EmuDeck in Desktop Mode on your Steam Deck and select Ryujinx as your primary emulator. You must provide your own legally dumped Switch firmware and prod.keys files, placing them in the specific Ryujinx BIOS folder. Finally, use Steam ROM Manager to parse your game files so they appear in your SteamOS library with proper artwork and metadata.
The rise of the Steam Deck has been nothing short of a revolution for portable enthusiasts. Market research from IDC estimates that total sales for the Valve Steam Deck reached approximately 3.7 million units by the end of 2024, accounting for 48% of the global handheld gaming PC market that year. As a hardware editor, I have seen dozens of competitors enter the ring, but none offer the software flexibility that Valve provides. EmuDeck takes that flexibility and streamlines it, turning a complex Linux environment into a seamless gaming machine.
Step 1: Prepare Your Hardware and Storage
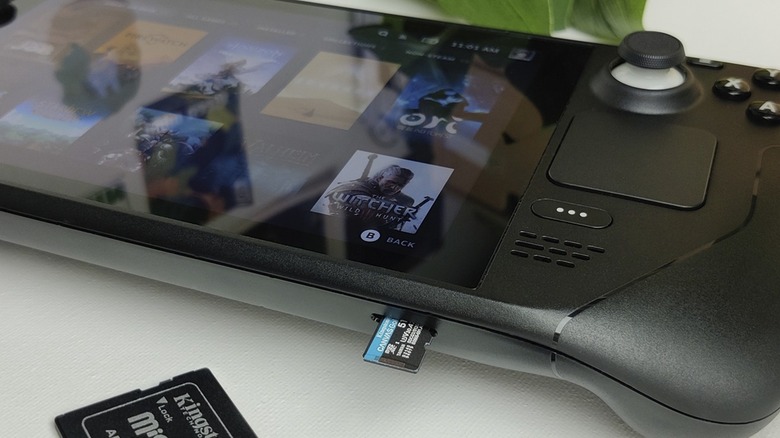
Before diving into the software, we need to ensure the foundation is solid. The most common mistake I see users make is using a poorly formatted storage device. If you are using a microSD card, it must be formatted to the ext4 Linux file system. SteamOS does this natively in Gaming Mode, so handle that before switching over to the desktop.
To begin the EmuDeck Switch setup, press the Steam button, navigate to Power, and select Switch to Desktop Mode. This is where you will perform the heavy lifting. While in Desktop Mode, your trackpads will enter Lizard Mode, allowing them to function as a mouse. One pro tip: go to your System Settings and set the screen and power energy savings to 30 minutes or more. You do not want the Deck falling asleep while transferring 20GB of game data.
When setting up EmuDeck Switch games on Steam Deck SD card storage, ensure your SD card has a simple name with no spaces, such as SD_Card. Linux directory paths can be sensitive to special characters, and keeping it simple prevents the emulator from losing the path to your ROMs.
Once EmuDeck is downloaded from their official website, run the installer. I recommend the Easy Mode for most users, but ensure you select Ryujinx when the emulator selection screen appears. Ryujinx currently offers the most consistent handheld gaming performance and better updates for newer titles.
Step 2: The EmuDeck Switch BIOS Guide & Firmware
Switch emulation on Steam Deck requires specific system files to function properly. Unlike older consoles, you cannot simply drop a game file and hit play. You need system decryption keys and the actual console operating system files.
Technical Callout: Directory Paths All BIOS and key files must be placed in the following directory:
/home/deck/Emulation/bios/ryujinx/keys/If you installed EmuDeck to your SD card, the path starts with the name of your SD card instead of/home/deck/.
Here is your checklist for required files:
- prod.keys: The primary decryption key.
- title.keys: Necessary for identifying specific titles.
- System Firmware: Usually a .zip file containing the console's internal software.
To install the system firmware, launch the Ryujinx emulator while still in Desktop Mode. Navigate to the Tools menu and select Install Firmware from an XCI or ZIP file. Navigate to your firmware file and confirm the installation. It is vital to note that decryption keys must be updated whenever you install a newer version of the Switch firmware. If your keys are from version 16.0 and your firmware is 17.0, the games will likely fail to launch. This is the most common hurdle in the EmuDeck Switch BIOS guide process, so always keep your files matched.
Place your prod.keys and title.keys in the Emulation/bios/Ryujinx/keys directory. Without these, Ryujinx will show an empty library or throw a "Keys not found" error. This specific step is the "secret sauce" of a successful how to install Switch firmware and prod keys in EmuDeck workflow.
Step 3: Steam ROM Manager Parser Tutorial
The beauty of EmuDeck is that you don't have to stay in Desktop Mode to play. We want these games to look like native Steam purchases. This is handled by a tool called Steam ROM Manager.
Open the EmuDeck application and select the Steam ROM Manager tool. You might see a warning about closing Steam; let the app close Steam so it can write to your library files. On the left sidebar, find the Nintendo Switch - Ryujinx parser. Toggle this on.
You need to ensure your ROM directory structure is correctly linked. By default, EmuDeck looks in /Emulation/roms/nintendo switch/. If you have your games elsewhere, click the folder icon in the parser settings to point it to the right spot. Once ready, click the Preview button at the bottom, followed by Parse.
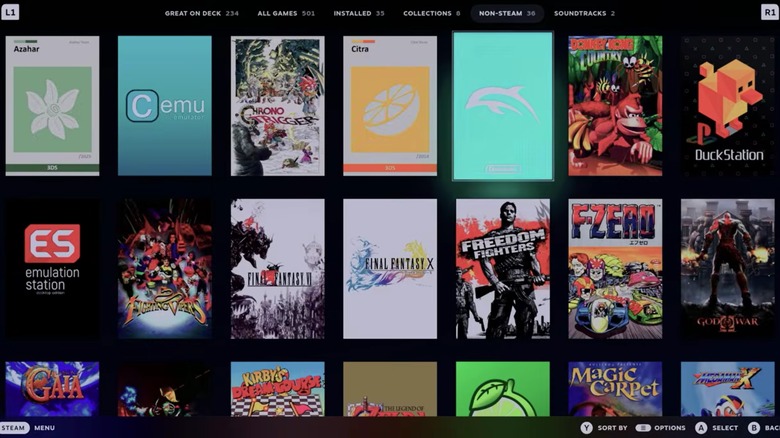
This tool is a comprehensive EmuDeck Nintendo Switch setup guide for Steam Deck library integration because it automatically performs game artwork scraping. You will see your library fill up with high-resolution covers and banner art. If everything looks correct, click Save to Steam. This creates individual shortcuts for each game under the Non-Steam category in your library, allowing for that premium Gaming Mode experience. This Steam ROM Manager Switch parser configuration tutorial ensures your Deck feels like a dedicated console rather than a PC.
Step 4: Ryujinx Settings & Performance Optimization
Now that your library is set up, we need to focus on performance optimization. While the Steam Deck is powerful, emulating modern hardware requires some finesse.
Open Ryujinx in Desktop Mode one last time to tweak the Ryujinx Steam Deck settings. Navigate to Options > Settings > Input. Here, you should enable GyroDSU. For the server IP, use 127.0.0.1. This is the key to enabling Ryujinx motion controls and gyro on Steam Deck, which is essential for games like Breath of the Wild or Splatoon.

Next, head to the Graphics tab. Ensure your Backend is set to Vulkan. For the best Ryujinx settings for Steam Deck game performance, I recommend setting the Resolution Scale to Native (720p/1080p). Pushing the resolution higher on the Deck's 800p screen often leads to unnecessary frame drops.
Warning: Proton Compatibility Pitfall Once you return to Gaming Mode, do NOT go into the shortcut properties and check "Force the use of a specific Steam Play compatibility tool." EmuDeck games use a Linux-native launch script. Enabling Proton will cause the game to fail on launch.
Another crucial factor for handheld gaming performance is shader cache compilation. When you first play a game, you may notice small stutters as the Deck "learns" the graphical effects. This is normal. Over time, as your shader cache builds up, the experience will become buttery smooth. Some users prefer to download pre-built shader caches, but building your own ensures compatibility with your specific Ryujinx version.

For graphically demanding titles, you can use the Steam Deck's built-in Quick Access Menu (the "..." button) to set a Refresh Rate of 40Hz and a Frame Limit of 40. This provides a much smoother feel than a fluctuating 60 FPS and significantly improves battery life for long sessions.
FAQ
How do I set up Switch emulation on EmuDeck?
To set up Switch emulation, you need to install EmuDeck, select Ryujinx as your emulator, and then manually add your legally obtained prod.keys and system firmware to the Ryujinx BIOS folder. Once the files are in place, use Steam ROM Manager to add the games to your Steam library.
Can EmuDeck play Nintendo Switch games?
Yes, EmuDeck can play Nintendo Switch games by acting as a management layer for emulators like Ryujinx. It automates the directory creation and library integration, but it does not provide the copyrighted game files or system BIOS.
What files are needed for EmuDeck Switch setup?
The essential files for an EmuDeck Switch setup include the prod.keys and title.keys files, along with the System Firmware. These must be dumped from your physical Nintendo Switch console. Additionally, your games must be in .nsp or .xci formats.
How to add Switch keys and firmware to EmuDeck?
You must navigate to the Emulation/bios/ryujinx/keys folder and paste your keys there. For firmware, open Ryujinx in Desktop Mode, go to Tools, and select Install Firmware. Make sure the firmware version matches the version of the keys you are using.
Which Switch emulator is best for Steam Deck?
Currently, Ryujinx is the recommended choice for the Steam Deck due to its high compatibility rate, active development, and excellent support for the Steam Deck's motion controls and gyro sensors.
How to optimize Switch game performance on EmuDeck?
Optimization involves using the Vulkan graphics backend, keeping the resolution at native 1x, and enabling the shader cache. Using the Steam Deck's 40Hz/40FPS lock can also provide a more stable experience in demanding titles.